Thursday, October 1, 2015

Fall is in the air somewhere

Most of the country is feeling the crisp air of Fall, the colors, smells and fruit harvest that make my favorite pies.  Not so much here in Arizona.  We are still experiencing temps well over 100 degrees on this first day of October.
Growing up and living my early adult years in the northeast I had a love/hate relationship with Fall.   I loved the vivid colors and jumping in the leaves, pumpkin and apple pies.  I hated that the falling leaves signaled the coming of winter and months of cold, snowy weather.  I was not fond of snow and cold even as a kid.  I was happier staying inside reading or crafting up a mess.
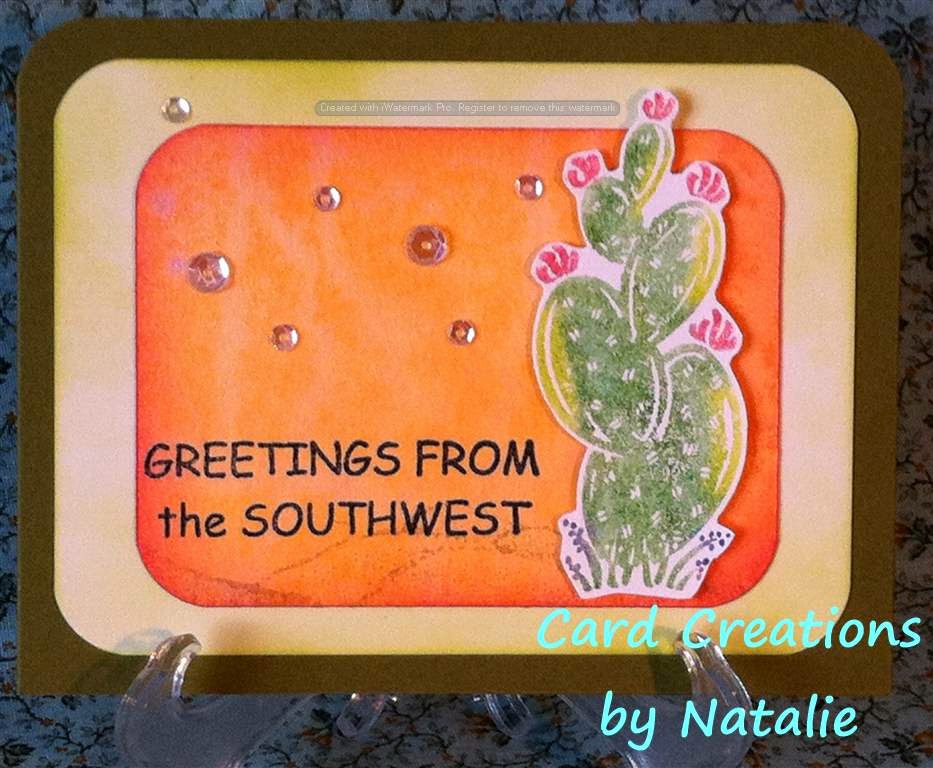
I am still inspired by those vivid Fall colors though.  Here are a couple of cards I made this week using Color Burst that nod to the season.
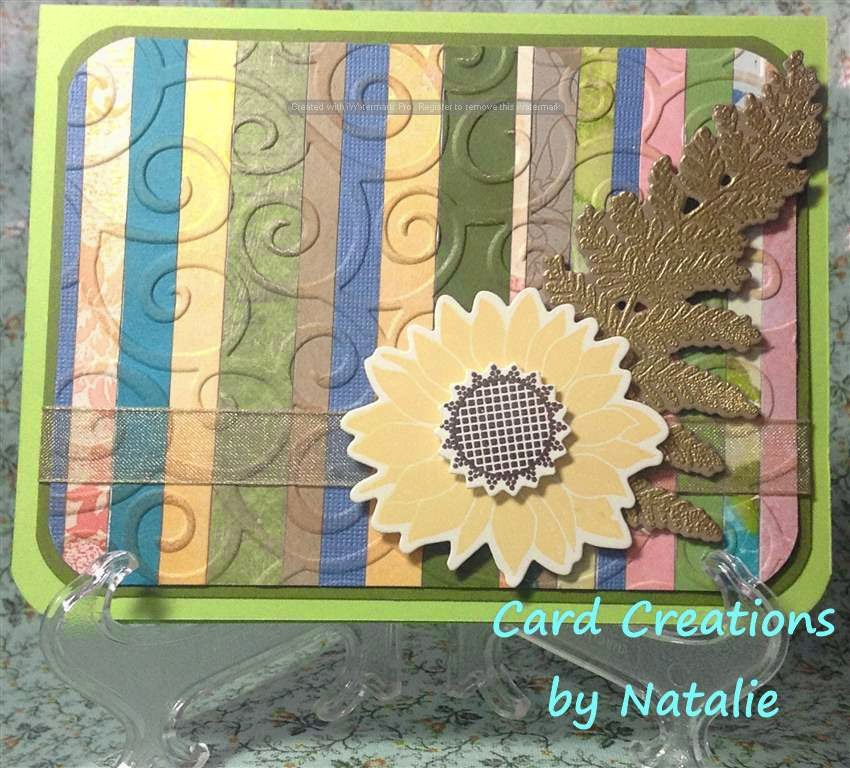
For this card, I started with one of the Color Burst backgrounds I made last week using the hexagon stencil. There is a layer of velum over the background which mutes the vivid pattern and allows the focal point to stand out. The stamps and dies are all from PaperTrey Ink.  I stamped the sunflower and leaves with Distress Ink with a rock and roll method.  Then I used a damp paintbrush to soften and blend the colors and add some extra dimension.

I've had this pear stamp for many years and it's no longer on the wood block, so I do not remember the brand.  I love using it for watercoloring.  There are so many wonderful shades of pears to choose from if you are sticking with nature and the unnatural possibilities are endless.  I used Color Burst as my paint from an artist palette.  The background paper is also Color Burst.  I die cut the center out with a stitched die and then die cut my pears out with the same die.  This allows me to nest or inlay the two layers together.  I wanted a little bling,  but didn't feel like sequins.  I love how the copper die cut Hello and banner add that pop without the bulk.


Here's a closeup of the banner with the layer of vellum under it.  The vellum adds a little more visual interest that's there, but almost not.  I originally thought I would staple the banners on, but decided to keep it clean by just taping them down.  The card base is also a PaperTrey product.  It's a lovely heavy weight and makes for sturdy cards.

Wednesday, September 23, 2015

Color Burst with a stencil technique


Today I thought I'd give you a technique in pictures for using Color Burst with a stencil.  Here is a card I made with one of the prints as well as the other two prints I made during the process. I offset the cover plate die just a bit to allow the Color Burst print to show thru.  The dahlia stamp was embossed with a burgundy powder and then I added water and dropped in some of the Merlot Color Burst mixed in water on each petal mixed in water on each petal
 .
I started with a stencil I had already cut and used several times.  This Hexagon cover plate die is by Papertrey Ink.  I love this die and once I get it out, I have trouble moving onto something else.  I had cut my stencil from a soft plastic material which may have been a report cover originally.  The watercolor paper I prefer to use is Canson  XL. I cut a 9x12 sheet into quarters which makes it a great size to work with for cards.


Lay the stencil down and start sprinkling on Color Burst gently.  I used Merlot, Burnt Orange and Yellow Ochre from the Earth tones set.  See how little it looks like I've used?  The color is so deep and rich, this will be plenty.
Next I spritz the Color Burst with water.  Not too much or it will start to run under the stencil. As you can see in the final product, it spread out enough to fill the spaces with even this small amount of water.


I lightly spritzed my next piece of watercolor paper and gently lifted the stencil and turned it over onto it.  I let this one set for a minute or so for the color to spread. As you can see my paper started to curl because I did not bother to secure it down.  No worries.  The paper isn't so wet that anything ran and it flattened out when it dried.
Here is how it looked when I removed the stencil.


I did the same thing for the third piece.

Here are my 3 prints from right to left.


Since I had my hexagon cover plate die out for today's card, I decided to make another card from a background  piece I had previously made.  The spirit of Christmas took hold of me while I was assembling this one and I had to use this scrolled Joy stamp embossed on velum to finish it off. The Delightful Dahlia stamp and dies are also by Papertrey Ink.

Saturday, September 19, 2015

Burst of fun with Color Burst

Color Burst by Ken Oliver Crafts is my new favorite tool for watercoloring.  I have been experimenting with many different ways to use it.  I love the randomness of sprinkling it on and spritzing it with water.  I could make backgrounds all day by doing this.
I've also been sprinkling it through a stencil and then using the leftover pigment on the stencil to get more prints.  This is a great way to use the color up and not waste all that glorious pigment.
Stencil- Butterflies by Delta, Celebrate thinlit die by Sizzix

Celebrate Stamp by StaminUp


Here are 3 prints I made using the new Earth Tone Color Burst and a stencil. First I placed a stencil over my watercolor paper and gently sprinkled the color on.  Then I spritzed with water.  I laid a second piece of watercolor paper on top to soak up some of the  Color Burst on the stencil.  I gently removed that piece and then lifted the stencil to remove the bottom one.  Finally, I spritzed the stencil with a little more water and placed it face down on a third piece of watercolor paper. I think this color combo for fall cards is fantastic.
To create this background, I ran my watercolor paper through an embossing folder.  Then I  gently rubbed a white crayon over the raised areas.  Finally, I sprinkled Color Burst on it and spritzed with water until the colors blended and filled in the spaces.  For the Lily flower, I embossed with white embossing powder on watercolor paper and used the Color Burst Alizarin Crimson to fill in with water and a brush.  I fussy cut the lily and the pad.  Lily4me stamp by Stamps of Life


Thursday, August 28, 2014

Welcome to my little creative corner of the world.

Happy Birthday embossed watercolor

Navy blue watercolor background Birthday- teal envelope


Colored pencil strawberries


Watercolor Greetings from Tucson

Watercolor Greetings from SW

Watercolor Dahlias- blank


Watercolor Pears


Watercolor background Queen Anne's Lace- teal envelope


Yellow Daisy watercolor

Queen Anne's Lace

Foiled Hello- teal envelope


Watercolor Hummingbird- teal envelope

Scraps and Sunflower

More cards

I've been having a lot of fun experimenting with different watercolor techniques.  Some of those cards are in the first batch and some are in this one.  Some of the cards have coordinating envelopes instead of plain ones.  I love it when I can use a paper on the card and have a piece leftover to make the envelope with. 
Beautiful Blue Sunflower- Teal envelope


Hey there, Chickadee-Teal envelope


Just to say dahlias


Sending Sunshine Doodliedoo


Thank you Garden Grace- coordinating envelope

Water spot Birthday- Birthday greeting inside


Wish Big Gelatos- Happy Birthday greeting inside